Rust Removal Electrolysis
Man, don’t throw that wrench away. And definitely don’t spend three hours hitting it with a wire wheel until your hands are vibrating.
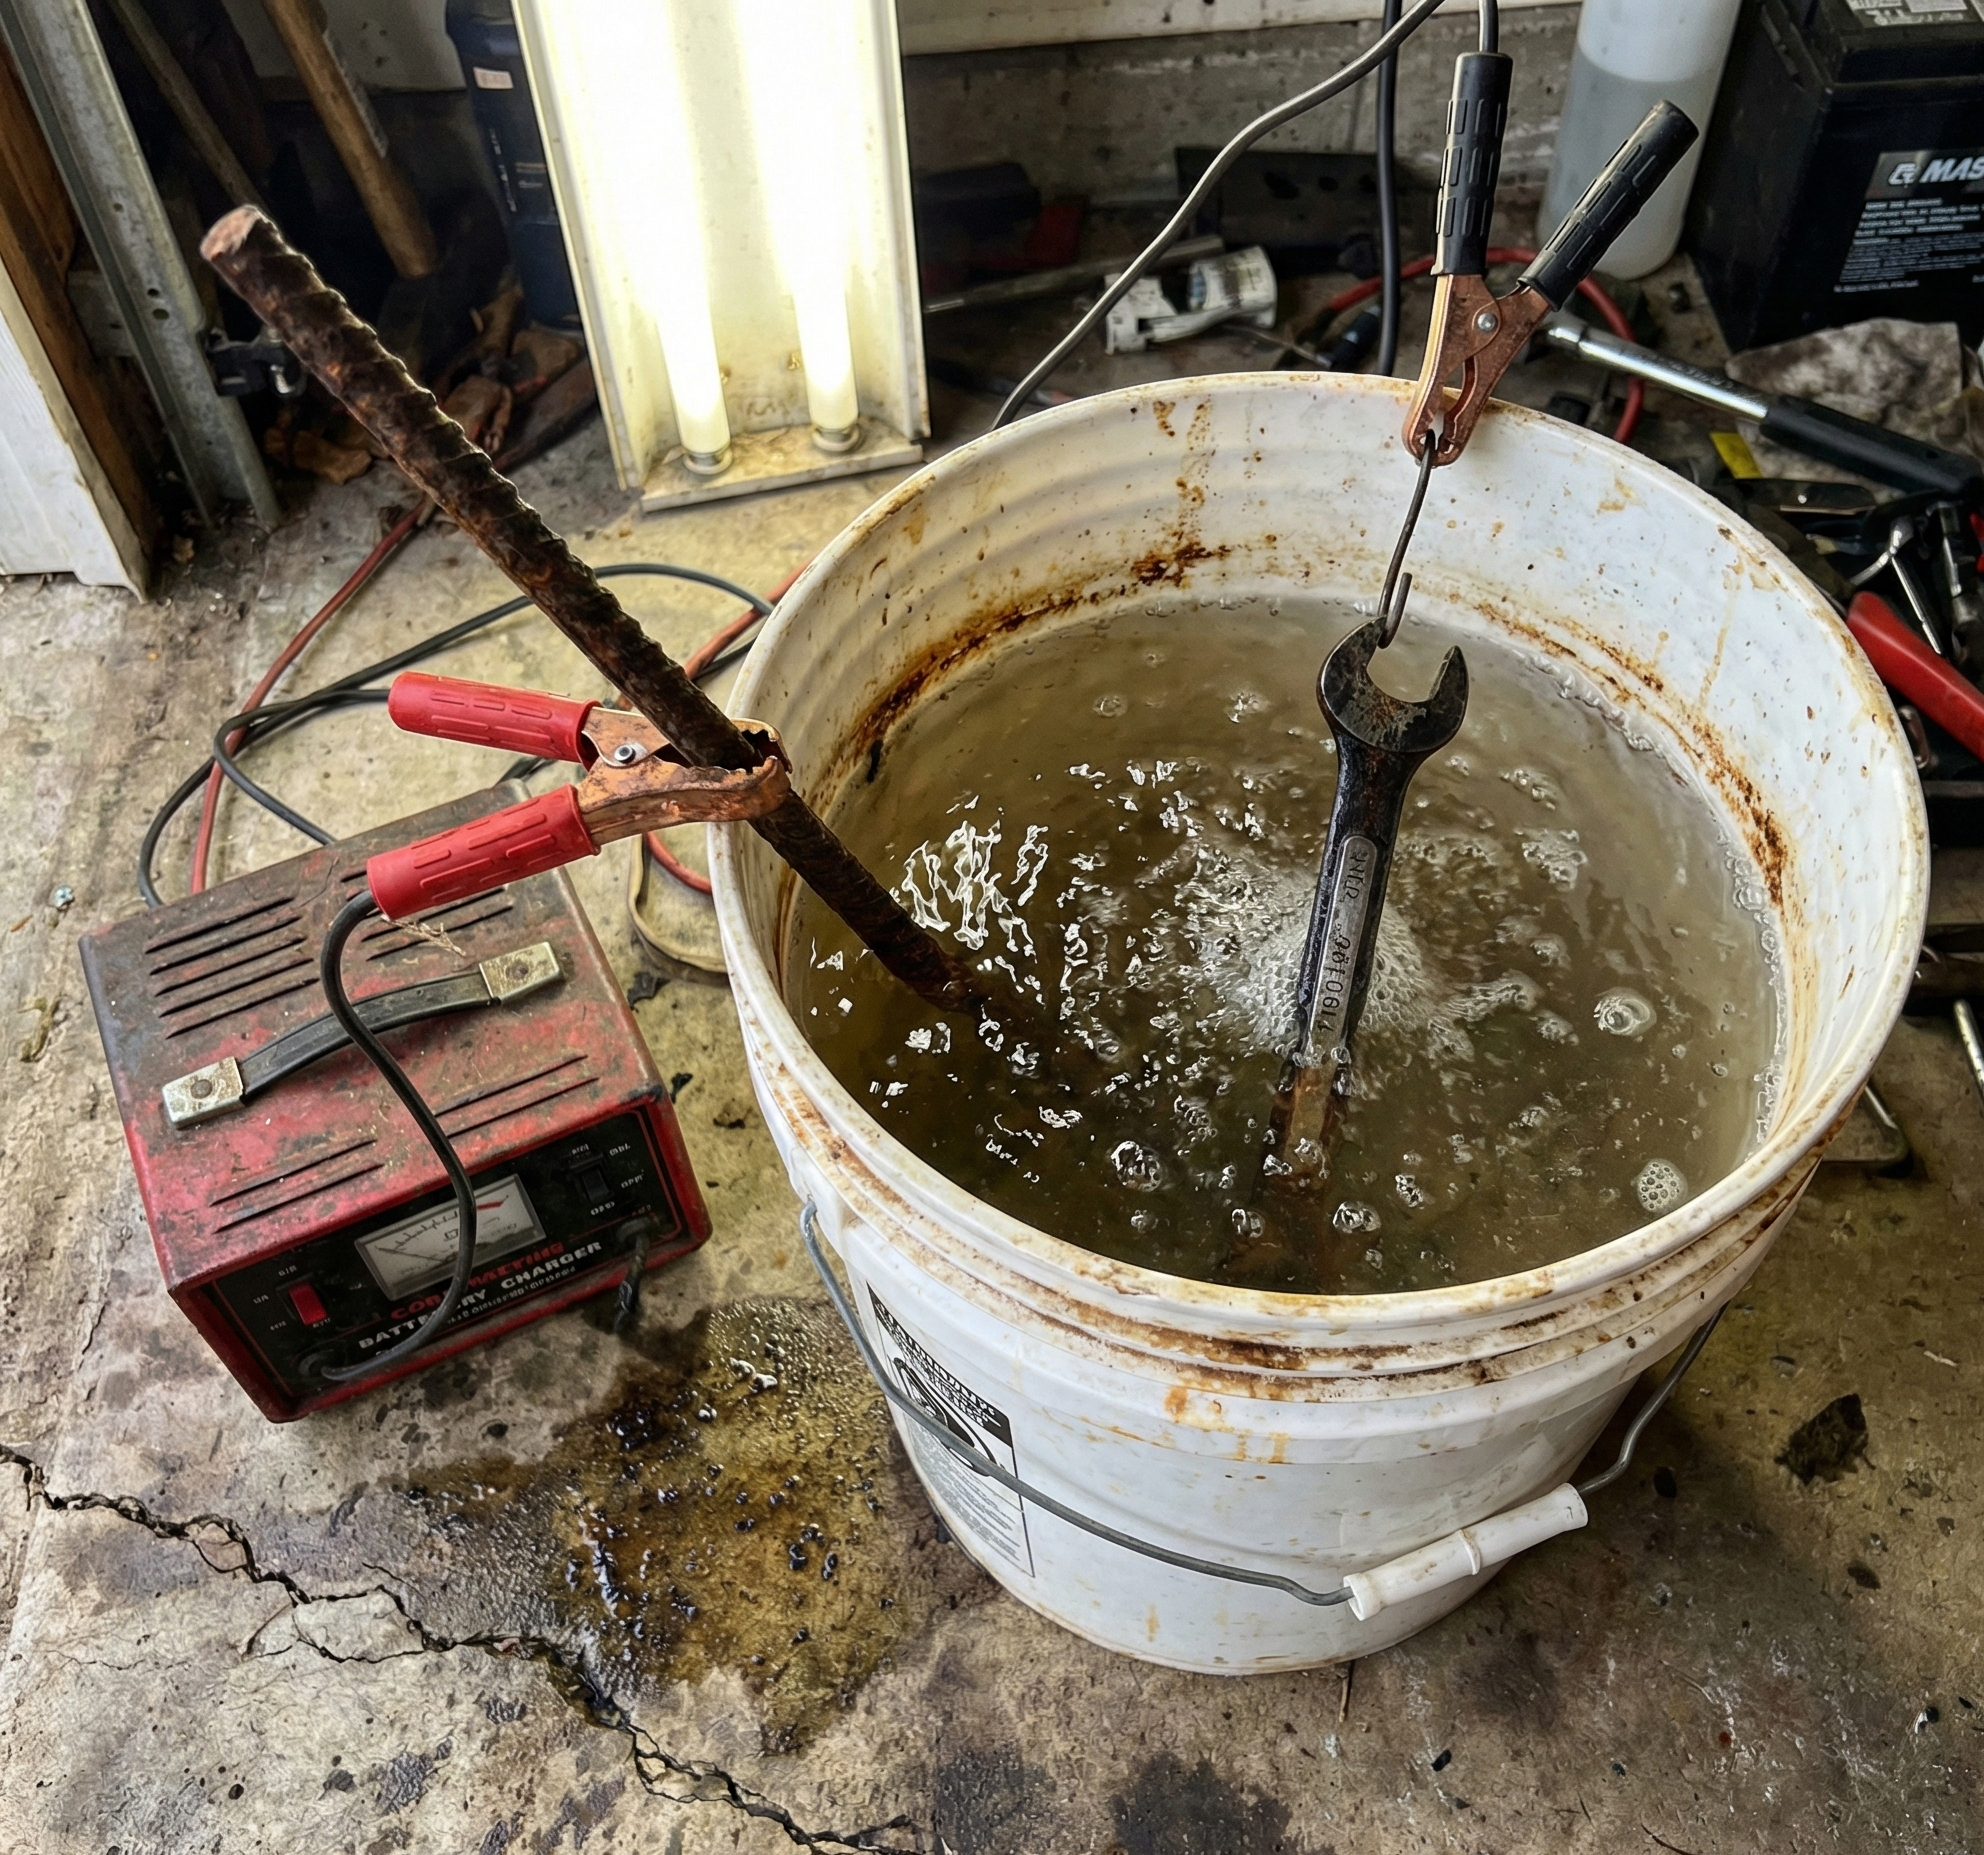
You can strip that rust off while you sleep. We’re going to build an electrolysis tank.
The Setup: Grab a 5-gallon bucket and fill it with water. Dump in a cup of Washing Soda (Arm & Hammer makes it—it’s in the laundry aisle. Don’t use Baking Soda; it’s too weak).
The Rig:
-
The Sacrificial Anode: Clamp a piece of scrap iron or rebar to the side of the bucket. This is going to eat the rust.
-
The Patient: Hang your rusty part in the middle. Do not let it touch the rebar.
-
The Power: Hook up a manual car battery charger (12V).
-
RED (Positive) goes to the Scrap Iron (Rebar).
-
BLACK (Negative) goes to the Rusty Tool.
-
The Result: Flip the switch. It’s going to bubble like a witch’s cauldron. Come back in 4 hours. The rust will wipe off with a rag. It’s the most satisfying thing you’ll do all weekend.
Note: Do this outside. It makes Hydrogen gas. Don’t blow up your garage.
#rocketcity #huntsvilleelectrician #huntsville #toolrestoration #electrolysis