The Graphite Circuit
I’m Michael from Huntsville Wire and Home. I believe the best way to teach your kids about the wires in their walls isn’t to lecture them, trying to explain voltage and current to a seven-year-old? Maybe, It’s better to show them—let them build a circuit themselves. This experiment turns a simple pencil into a conductor; it takes the invisible power running your home and puts it right on a piece of paper—safely.
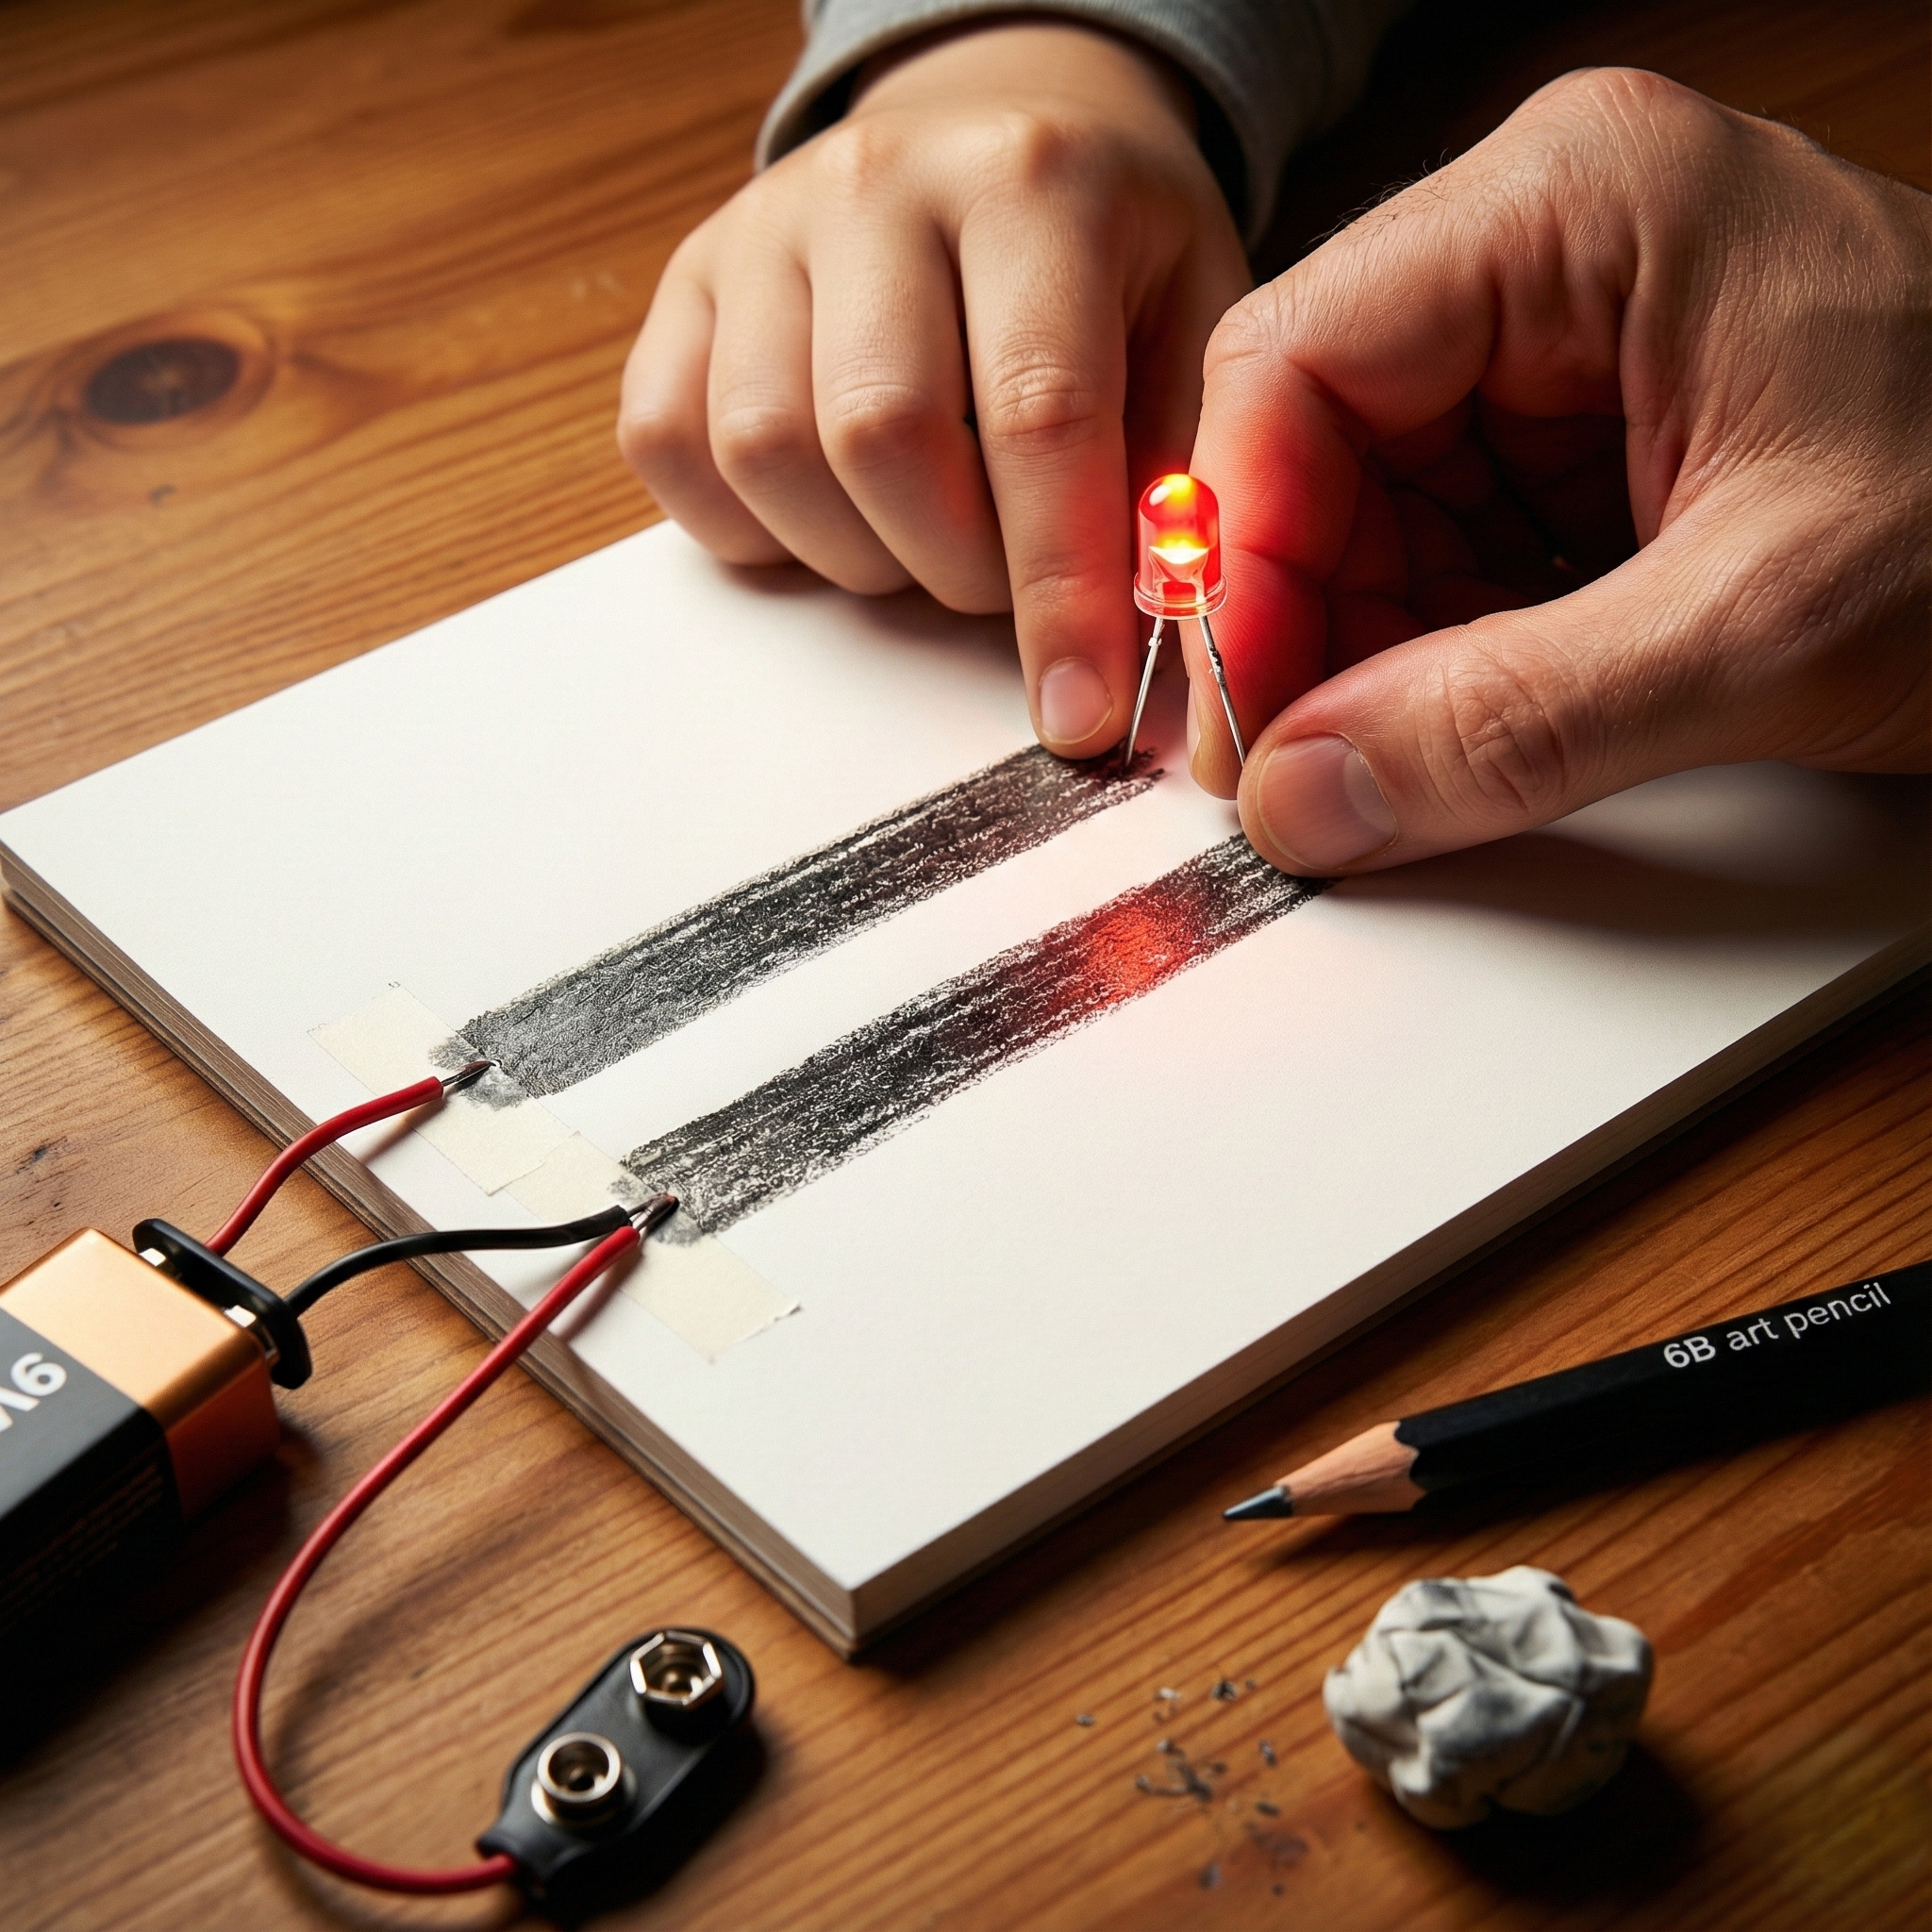
The Experiment: Draw a thick line with a soft pencil on paper. Use the line to complete a circuit and light an LED. The Lesson: Conductivity. Graphite (carbon) conducts electricity, just like the wires in your walls. Steps and materials below.

1. The Shopping List
-
A “Soft” Pencil: Look for 6B, 8B, or 9B (available at walmart, any art store or hobby lobby). If you are in a bind, a carpenter’s pencil works better than a school pencil.
-
Paper: Thick cardstock works best so you don’t tear it when drawing hard.
-
9V Battery: The square kind.
-
9V Battery Clip/Snap: You can buy these cheap, or just tape wires to the terminals.
-
LEDs: Standard 5mm LEDs (Red or Yellow usually work best with lower voltage).
-
Tape: Scotch tape or electrical tape.
2. The Experiment (Step-by-Step)
Preparation (Dad duty):
-
The Track: On the paper, draw two thick parallel lines about 1 inch apart. They need to be heavily colored in. Go over them multiple times. You want a solid layer of shiny graphite.
-
The Hookup: Connect the positive wire (red) from the battery to the start of the left graphite line. Connect the negative wire (black) to the start of the right graphite line. Tape them down firmly right on top of the drawing.
The “Action” (For the kid):
-
Safety Check: “We are using a 9V battery. Do not touch the two wires together directly, or the battery will get hot.”
-
Take the LED. Spread the legs out.
-
Place the LED on the paper so the long leg (Positive) touches the line connected to the Positive wire, and the short leg (Negative) touches the other line.
-
The Magic Moment: Press the LED legs down firmly onto the pencil drawings. The light will glow.
-
Troubleshooting: If it flickers, color the lines darker/thicker to add more graphite.
3. The why
You know how we use copper wire in the walls of our house to move electricity? Well, the ‘lead’ in this pencil isn’t actually lead; it’s graphite. Graphite is a crystal that lets electricity hop through it, just like a wire. We just drew a wire on a piece of paper.
The Real-World Connection:
But notice how the light isn’t super bright? That’s because the pencil line makes it hard for the electricity to push through. That’s called Resistance. We use resistors in electronics to control how much power goes where—so things don’t blow up. Poof!
4. The Bonus info (Dad Flex)
The Dimmer Switch: While the LED is lit, slide the LED legs further away from the battery connection (making the path longer). The light will get dimmer. Slide it closer to the battery (making the path shorter). The light will get brighter.
See that? The longer the road, the tired the electricity gets (more resistance). This is exactly how a dimmer switch on the dining room wall works.
If you have questions or need help with electrical work in the Huntsville area, visit us at huntsvillewireandhome.com or give us a call. We’re here to help.